This post is suitable for both Experts with Metasploit and beginners. It
applies to all Debian-based Linux distributions with Metasploit pre-installed.
If your system doesn't have Metasploit yet, follow the provided instructions
to install it before proceeding with Armitage.
Please pay attention to all steps and screenshots for better understand.
Installing Armitage on Kali Linux (And Debian-Based Distributions)
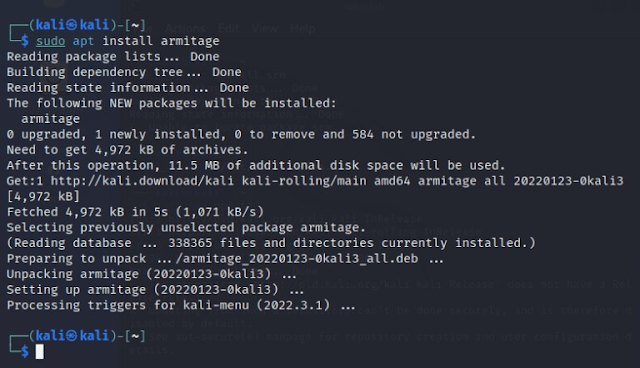
To start, use the apt package manager to install Armitage, as shown in the
screenshot below.
sudo apt install armitage
Once the installation is complete, start the Metasploit database by executing the following command.
sudo msfdb init
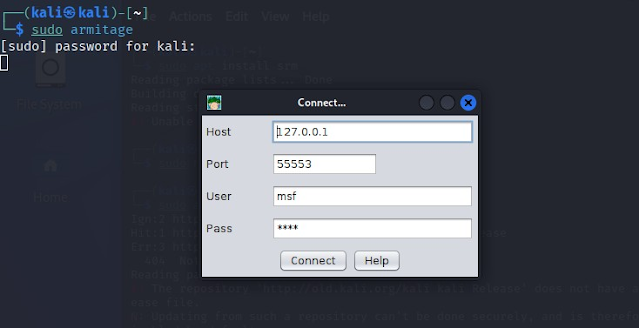
After starting the database, you can now launch the Armitage, as shown in
the image below.
You'll be prompted to enter the database host, port, user, and password. You
can keep these at their default settings if you want.
sudo armitage
You'll be asked if you want Armitage to start the RPC server. This server isn't necessary, but you can run it if you want Metasploit to connect with other apps. Otherwise, you can keep it turned off.
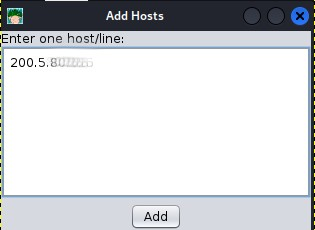
You can start by adding a host (target) to scan.
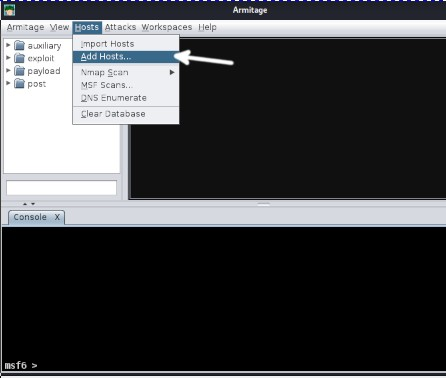
To add a host, click on the "Hosts" option in the top menu bar, and then
click on "Add Hosts," as shown in the image below. If you have a file with
hosts to import, you can click on the first option.
If the host was added successfully, a pop-up box will appear. Click "OK." A computer icon representing the host will then appear in the hosts' section.
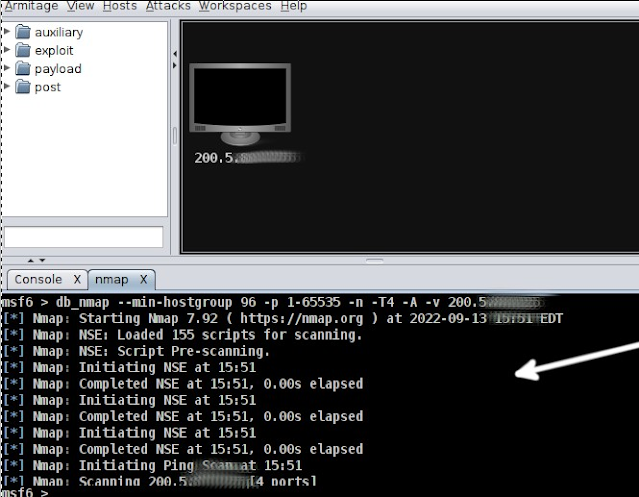
After adding a host, you can begin a scan. To do this, click on "Hosts" again, and then click on "Nmap Scan." Choose the type of scan you want. In this example, I chose an intense scan on all TCP ports.
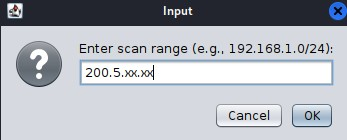
You will be asked to confirm the target shown or enter the correct one. If you only add a host, it will appear automatically. Then, click "OK."
The scanning will start. Wait for it to finish. If you selected an intense scan, it might take hours.
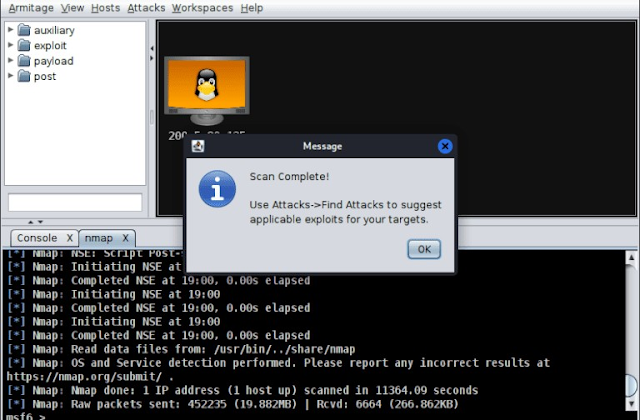
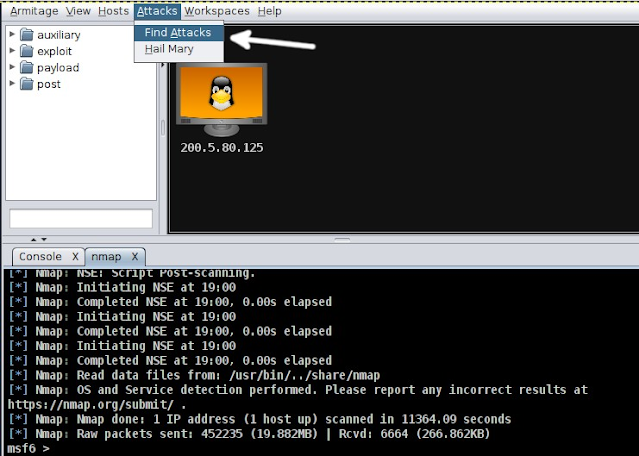
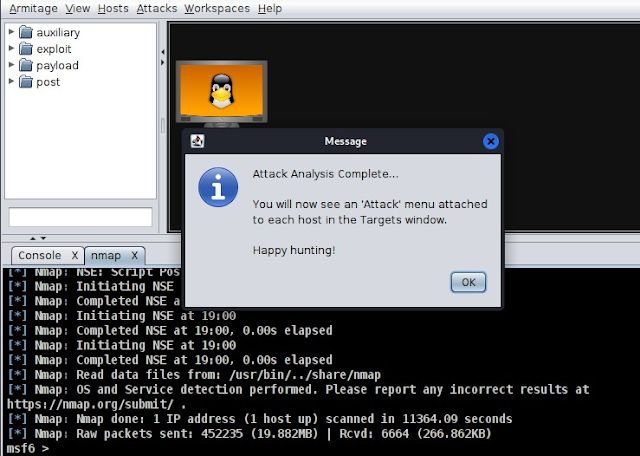
After the scan finishes, a message box will appear, like the one below. It will tell you the scan is done and will ask you to click on the "Attacks" menu and then select "Find Attacks."
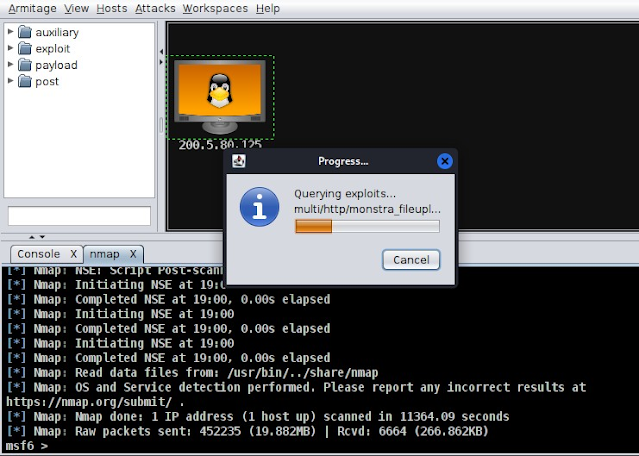
Armitage will begin looking for ways to exploit vulnerabilities based on the results of the previous scan.
After the analysis is finished, click the host with the right mouse button. Then, click "Attack" to see exploits that work with the scan results. Pick any exploit you'd like to use.
Troubleshooting: Attack Menu Doesn’t Show Up in Armitage
Lots of users say that after analyzing exploits, they can't see the Attack
menu. This happens because Armitage only displays exploits that are highly
likely to work, by default.
You can tell Armitage to be less strict and allow some room for error,
showing exploits with medium to low chances of success. That's what I did in
this tutorial.
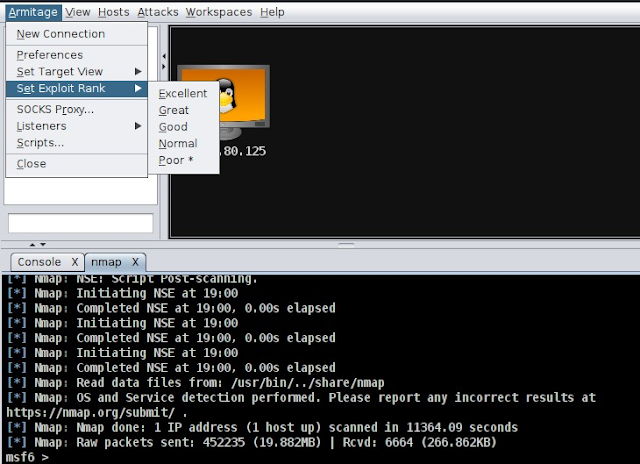
To do this, click on "Armitage" in the top menu, then click on "Set Exploit
Rank" and choose the rank you want to test.
If you pick the "Poor" option, you'll see many exploits, but most of them won't be useful. If you choose the "Excellent" option, you'll only see exploits that work against the target you've selected.
Conclusion
Armitage is a good choice for people who don't know much about using the
Linux command line. Its graphical interface is simple and easy to
understand, unlike Metasploit, which needs you to know specific commands.
Installing Armitage on Kali Linux and Debian-based Linux systems is
straightforward and can be done by any Linux user, no matter their skill
level. This means even beginners can test how secure their system or network
is. However, it's a good idea for users to learn the command line version
too, because not all systems have a graphical interface.
Thank you for reading our guide on installing Armitage on Kali Linux and
starting to use it. Stay with us for more useful Linux tips!

